Showing posts with label hello holidays. Show all posts

Wednesday, June 27, 2012

Kitchen Revival // Independence Day Recipe Round Up


It's almost the 4th, and what better way to celebrate than with a backyard BBQ {unless you're in AZ, then it's a poolside BBQ}?

Here's a collection of delicious recipes to make your dinner sparkle as much as the fireworks!


Source: recipe.com via Nancy on Pinterest


Source: ourbestbites.com via A on Pinterest


Source: womansday.com via Jamie on Pinterest


Happy Grilling!

Tuesday, June 26, 2012

DIY Tutorials // Extra Large Lollies


I've shown a tutorial here on hello there! house how to make paper lollies, but here's some simple directions on how to take those lollies to the next level! 


My extra huge lollies are made using Bazzill Basics new 24" x 12" cardstock found at Scrapbooks, ETC in Mesa. The Next size down is made with the 12" x 12" cardstock and the smaller size (the polka dot lollie) is made with printed 8.5 x 11" paper using Rhonna Designs Nautical Chic Papers


I followed the directions for the regular paper lollies, making my accordion folds hot dog style (use the long side) so it make them extra long. I had to use 5 pieces of paper to make a circle, it's really HUGE once you get it all hot glued together .


I repeated the process with the smaller pieces of paper (just 3 sheets for those) and added some more Nautical Chic Printable elements to jazz them up a bit. To attach the different sizes together, I punched holes in the lollies and wrapped them with wire. Then I cute out circles of chipboard from cereal boxes and hot glues those to the back for stability. Once I strung them up with Divine Twine from a punched hole in the largest lollie, they were ready to hang up! So fun & festive for the 4th, I think I'll leave them up until Labor Day!


Tuesday, June 5, 2012

DIY Tutorials // Independence Day Holiday Decorating with Rhonna Designs


One of our lovely sponsors of hello there house! home & garden event 2011, Rhonna Designs, has just launched an amazing new digital line, Nautical Chic which is perfect for printing out and decorating your homes & summer soirees coming up for next month. Check out her blog feature on her new line:


Rhonna DESIGNS: intRoducing>>>Nautical Chic!: I'm totally giddy to share my new collection: Nautical Chic! It's up on my site NOW! The art is vintage & modern mixed....

She was even featured on Utah tv showcasing her new line, check THAT out and & see all the fab things she created for the feature, with mini little tutorials about how to make some of her easy decor:

Rhonna DESIGNS: Nautical Chic Papers & Printables on Fresh Living ...: http://www.kutv.com/news/features/fresh-living/home-improvement/stories/vid_32.shtml Did you see the fun Nautical Chic projects on...

Here are my favorite printables from the kit, things that are easy to print, cut & CREATE!


Tuesday, April 3, 2012

D.I.Y. Tutorials // Easter Books


These books were made as a hand-out at a party. We are so pleased at how cute they turned out! And what fun to add something that isn't a basket or eggs to your Easter decor!

ONE // Get some books. We found these Readers Digests at a thrift store for .25 each. Using painters tape (or duct tape) tape off the pages of the book as a whole. Spray paint the outside and edge of the books. Once paint is dry, remove the tape (carefully).
 TWO // Use the front of the book as a template to cut out a rectangle of decorative paper that will fit as the cover of your book. You only need to do decorate the book that will be on top of the stack. Mod Podge the paper onto the book. Don't stress too much about air bubbles and perfect straightness. The air bubbles help the book look aged and the paper that hangs over a bit will be taken care of later. Mod Podge your image onto the upper half of the book cover. Wait overnight for books to dry completely.


THREE // Once dry, sand the edges with sand paper. Then distress with distressing ink and some paper towel. Use little if any on the spine, you don't want the original title of the book to show through.
sanding
distressing ink
FOUR // Embellish! Glue on jewels, flowers, glitter...whatever you want!

FIVE // Make your tags. I used shipping tags that you can get at any office supply store for a reasonable price. I used a sponge brush and painted the bottom third of the tag with craft paint making sure each brush stroke was in the same direction. I allowed them to dry with something weighing the tag down so that the tag wouldn't curl up because of the moisture. Add "Bunny Tales" to the tag in your cutest hand writing. We also chose to add some glitter glue and distressing ink.


FIVE // Tie the books together using your material of choice and add the tag.


Tuesday, February 14, 2012

Kitchen Revival // Sweetheart Breakfast


Valentine's Day. One of my favorite holidays and one of the only mornings I wake up early. A Sweetheart Breakfast is how we celebrate Valentine's Day at our house. I set the table with my festive dishes with their little valentine gift placed on the table (yes, we give them something small. Just another reason to spoil the children).

My kids are a little young for the making of Valentine cards, but next year I plan on making some valentine mail boxes similar to the ones below where we can slip in love notes to each other through out the beginning of the month. But the rule is you can't read them until our Valentines Breakfast! I can't wait. Obviously the cute mailboxes would be a part of the table-scape too.
valentine mail boxes
via the anderson crew


Last year I made Caramel French Toast from Framed. 


It really was amazing. So amazing that we make it all the time. So I need a new amazing recipe to make this breakfast more special. Here are a few that caught my eye.

Double Chocolate Waffles with Easy Berry Sauce from ourbestbites.com
double chocolate waffles with berry sauce via our best bites
Mini Puffed Oven Pancakes from ourbestbites.com!
mini puffed oven pancakes with berry sauce via our best bites

Cream Cheese-Stuffed Lemon French Toast with Berries from ourbestbites.com!
cream cheese stuffed lemon french toast with strawberries via our best bites
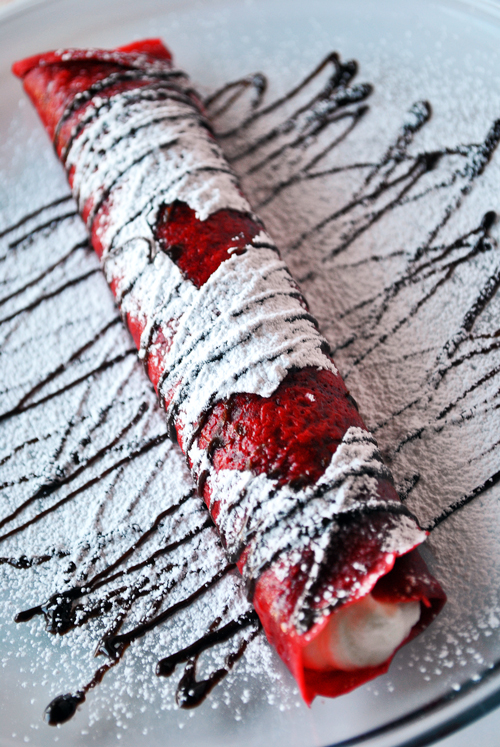
red velvet crepes via duhlicious

Are you drooling yet? I am. I hope you find the time to make tomorrow a real celebration of love with your family!

Tuesday, February 7, 2012

DIY Tutorial // Knotted Lace Valentine Garland

We have moved four times in four years and we are about to make our fifth move, and then there will be at least two more moves after that...so we live in rentals for the time being. Which means I can't change the fact that my walls are the color of mud. It is what it is, folks.

On to the tutorial! I have no Valentine's decor. Nothing. How? Why? I have no answers. I needed to whip something up that was quick, easy and expressed some love in my home in honor of the fast approaching holiday.

Here is what I came up with.


I literally used things I had already, but I will provide a list of materials so you can mimic the garland exactly (almost...although there are so many different avenues you can take this craft!!). And I added the  non-traditional color of mustard just so it would blend better with what I already had going on. 


 MATERIALS //

  • equivalent to 1 sheet of felt (all same color, different colors...I used half a sheet of mustard and half a sheet of red)
  • scraps of fabric of choice
  • embellishments (small silk flowers, heart felt cut-outs, lace trim, rhinestones, etc)
  • sewing machine OR needle and embroidery thread (I used the machine, but hand stitching would be darling!)
  • three different styles of lace (54 inches in length for each style)
  • hot glue gun
  • tacs (for hanging)  

ONE // Take your decorative scrap fabric and cut out three hearts. Use your elementary school skills here. I didn't use a template because I like the slight imperfections of handmade work, but you certainly could use one. I did make one of the hearts bigger than the rest, which would be your center heart.


TWO // Cut out a piece of felt that is bigger than your heart. Make sure you leave enough room for the color to show from behind. Sew the heart to the felt using your stitch of choice. Trim the felt to your liking. Mine is intentionally off center a bit. That's just how I like things sometimes. Repeat for your other two hearts.


THREE // Embellish those babies! This is my favorite part. Be creative. If this part intimidates you, just work in groupings of threes and keep the same color scheme throughout the hearts so they balance. Although you can change it up for the middle heart if you want. I added a crushed paper lace doily (just center it in the palm of your hand and then close your hand and smush your fingers around. It's fun.) and a velvet leaf to my center heart.


Where did I find velvet leaves? Aren't those pricey? So glad you asked. Remember all those holly bunches you see at the dollar store around Christmas time? Well, those holly leaves are more times than not velvet. Stock up during the holidays and then when needed, just trim the holly leaf into a normal leaf shape. See:

 FOUR // Take your lace and cut them into 18 inch increments. Then using a double-knot, take one increment from each lace and tie them together. Repeat until you have used all the lace. Now you have a long strand of lace with cute little knots! Find the middle and hot glue it to the center back of your big middle heart. Let it cool. Then measure the lace 25 inches out from the middle heart. Hot glue that part to the center back of another heart. Repeat in the opposite direction.

FIVE // Hang it up!


Related Posts Plugin for WordPress, Blogger...